
What?What?!
Two posts today? (And on the weekend, no less!)
Well, I'm a leeetle late to the party, so I need to catch up. Kinda lame to get excited about 31 Days of better blogging and not have 31 posts!
 |
| Day Two |
Besides, my husband finished our floors!

Here is the shiny new surface of my son's nursery that you're all so familiar with. (If you're not... well, HERE's the tour and you can find the 'nursery' topic over there on the right and you'll get an ear eye-full.)

As always, the before really helps you appreciate the after, right?!

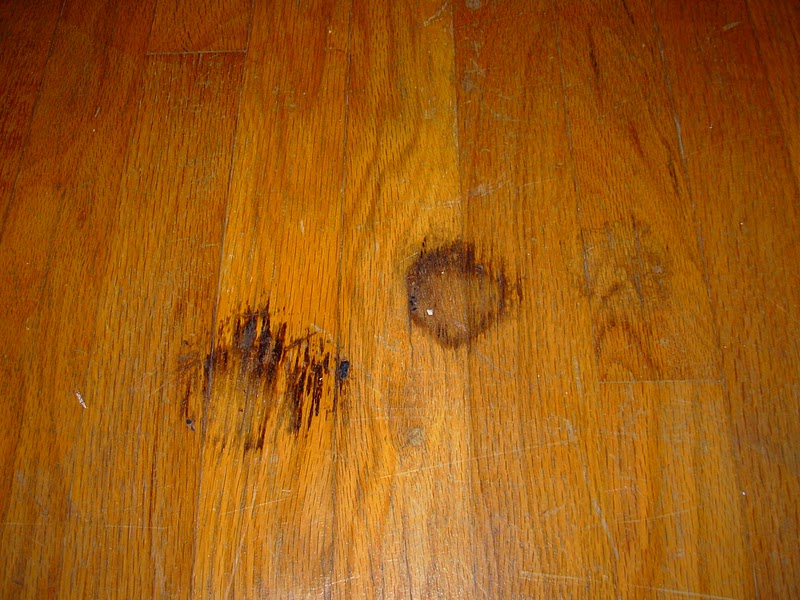
Want some close-ups of the old floor in that room?


Quick--I can't take the UGLY! Another after, this time of the master-soon-to-be-boys'-bunkroom.

Before:


Gross spots:


Boys'-room-soon-to-be-master after:

Before:

Nasty close-ups:


Hall before:

Hall after:

This DIY was completely my husband's doing. Well, I helped make this mess.

Here's a brief (and possibly inaccurate--I was relaxing at my mother-in-law's house) summary of the project.
Day 2: Mr. Ashes rented a sander from Menards. He bought sand paper, walnut stain and poly. It took forever to get the old varnish off using 80-grit, so my husband went back to town and bought 30-grit paper. I think he hit up two stores to get enough! Someone at the second store told him he could mop the floor with 409 to help cut through the varnish, so Mr. Ashes applied a 409/water mix to the floors and let it sit for a couple hours. He then mopped with plain water. Once it was dry he was able to finish the first room much faster!
Day 3: My sweetie was able to finish all the sanding--two bedrooms and the hall. He returned the rented sander and busted out his palm sander to finish the edges and corners. Mr. Ashes mopped the floors and applied the first coat of medium walnut stain.
Day 4: Mr. Ashes opted NOT to do a second coat of walnut stain because he loved the color after one coat. He applied the first coat of poly and went outside to mow our acreage. Busy man! That evening he applied the second coat of poly.
Day 5: Mr. Ashes took some time off from home-improvement projects during the day, but put the final coat of poly on that night.
Day 6: After letting the poly dry overnight (with the heat set to 80!) my husband did a happy dance all over their hard, shiny, CLEAN surfaces, snapped some pictures and emailed them to me. Which is what you're looking at above. Nope, I haven't seen the floors as of press time, but Mr. Ashes says their gorgeous!
Yet to do: Paint baseboards white and install quarter round. Along with a million and six other projects to get everything back in and looking nice.
Refinishing the floors took longer than we thought it would, but it's so nice to have it done! The good news, as with most home-improvement projects, is that we saved a lot of money! It costs $500-600 per room to have floors refinished professionally. Let's say it's $500 per room and the hall (and two closet floors) would be $2000. We still need to add receipts, but I'm sure it came in under $1000.
One last close-up of my beautiful new floor:
Stay tuned!


No comments:
Post a Comment