You know those long, narrow pictures behind your profile shot in Facebook? I find it difficult to get a picture that isn't too busy or distracting and that fits the shape of that 'cover collage'. Do you have that problem too?
Since the demise of the free online photo-editing site, Picnik, I've been using PicMonkey. I find it easy to use for editing photos, adding my watermark and other effects and labels like my laundry soap directions you saw last week.
One function I missed, however, was being able to make a collage. But guess what?! It's up and running on PicMonkey now!
Ok, here are the step-by-step instructions on how to make a Facebook cover collage using PicMonkey. Ready?
Go to picmonkey.com (pictured above) and select 'create a collage'.
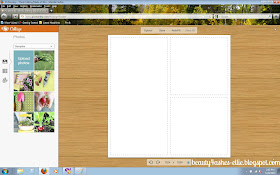 From the three gray icons on the left of the menu, select the 'layout' button in the middle.
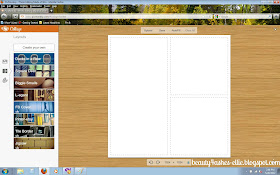
A new menu of layout suggestions is visible now. Select 'FB Cover' about half way down the list.
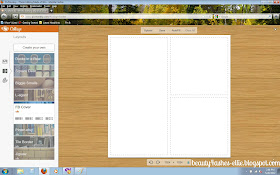
Now you can choose which format you want to start your collage with. (I find that this doesn't matter much because it's super-easy to change after you start filling in the photos.)
From the three gray icons on the left, select the top one to upload your images. There will be a selection of stock images if you want to experiment, or select 'upload images' (circled in yellow).
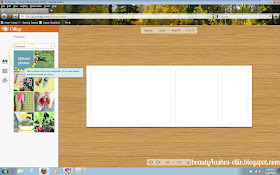
Follow the prompts to find your images from your computer.
Begin to fill in the squares! Images can be moved from different squares and the squares can be resized, added, deleted until you're happy with the layout.
From the three gray icons on the left, select the bottom one to make changes to the background of your collage (circled in red).
I narrowed the spaces between images, rounded the corners, and selected 'transparent background' in my sample image.
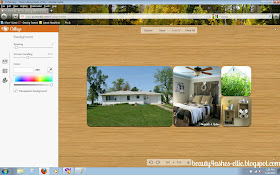
Now you're ready to save your collage! Select 'save' from the menu above your collage. I was worried about the file being a png instead of a jpg, but you can't change it, so just do it!
After you save your collage, select the 'X' at the top right to go back to the main PicMonkey page.
Now you can select 'edit a photo' and upload (or drag and drop) your collage png from where you saved it on your computer.
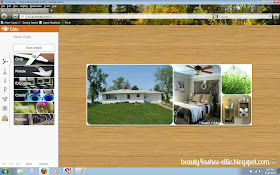
If you would like, you can crop, resize, change the exposure and many other things from this menu. For our purposes, let's select the 'P' from the left hand menu. This is where you would add a watermark or other text.

Type your desired text into the box and select which font to use. You can change the size and color of your text with the box that pops up, as long as the text is selected.
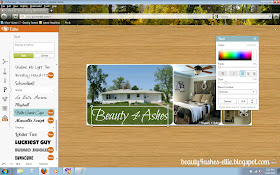
When you're happy with your image, save it! This time the 'save' button is on the bottom left of the page. (Not circled, but it was selected and there's a handy blue pop-up down there to show you what it should look like!)

You can choose if you want your image saved to your computer or to Facebook! If you choose to save it to Facebook, you can give it a caption and it will save it to a 'PicMonkey' album.
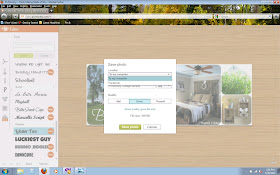
Whichever way you choose to save your collage, you can log into your Facebook account, go to your profile page and select 'change cover' (circled in red).
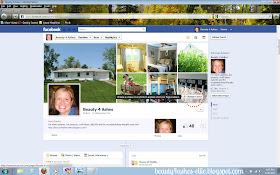
Follow the prompts and enjoy your new Facebook Cover Collage!
I used a different collage than the one we just made together, but the principle is the same. I made another collage for my personal Facebook page and used a slightly different collage as my blog header--did you notice?
So there you have it! I hope you are able to use PicMonkey to edit, add watermarks or make collages in the future. And I hope all of the options I'm getting used to using stay free!
Have a great day! Oh, and come like Beauty 4 Ashes on Facebook!
My Great Web page


Great advice and tips. I wondered WHY they came up with that odd-shaped space...along with WHY the timeline, anyway? ;-)
ReplyDeleteHi Ellie!
ReplyDeleteI was just trying out the new PicMonkey collage tool today. I know this new tool will make everyone so happy, especially those who are still missing Picnik..
I really like your tutorial. It should be a big help for those trying to make a collage. Yours turned out very nice.
Thanks for sharing at my party this week!
xoxo Bunny Jean
Oh yay! I didn't realize that they had gotten the collage feature yet!
ReplyDeleteGreat Tutorial!
ReplyDeleteThanks so much, it's a great help :)
Thanks for the tutorial. I need to do this for my FB page. You've made it look so easy!
ReplyDelete